Hello & Happy Monday Everyone!
This weekend my AWESOME Crafty friend
Georgiana from Carson's Creations
asked me if I would do a Follow up
Tutorial on the Baby Wipe Method Card I Made
So, I said SURE I could --
Now, I know there are some videos
on how to do this - But I only watched
1 video and it was from a Stampin' Up Demo.
from Aug. of 2017 -
When she did the Baby Wipe Method -
She used a Stamp with this method
Because that's how you're suppose to do it!
I tried it and didn't like my results with my stamp
and it was TOTALLY USER ERROR!
I should have used a Solid image stamp
Which, well I DID NOT!! LOL
And that's when I thought could I do this
on my water color paper?? Sure Enough &
I got some really NEAT RESULTS from it --
Soooo -- Here ya go - I hope it helps someone out!
I started out with Baby Wipes, 4 Distress Inks and some Tim Holtz Water Color Paper
Now - You can probably use ANY water color paper (I just like this type)
And YOU MUST use DYE INK - It's what works with this technique
So any dye inks you have will work! :)
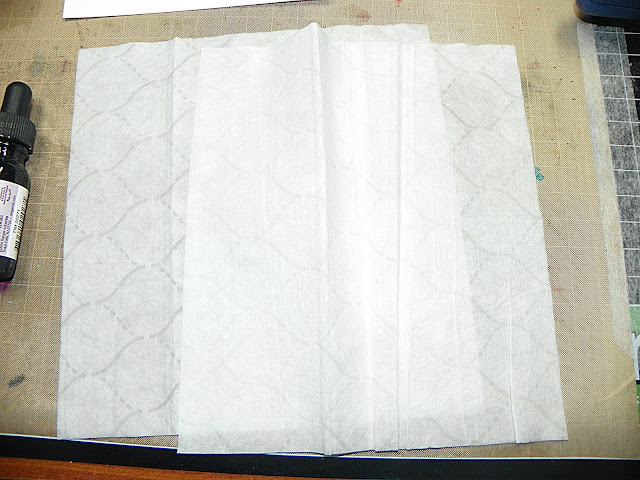
I took 2 Baby wipes and layed them on top of each other
I folded it in half
Then folded it one more time - to look like this!
You do this so the Baby Wipe acts like an Ink Pad
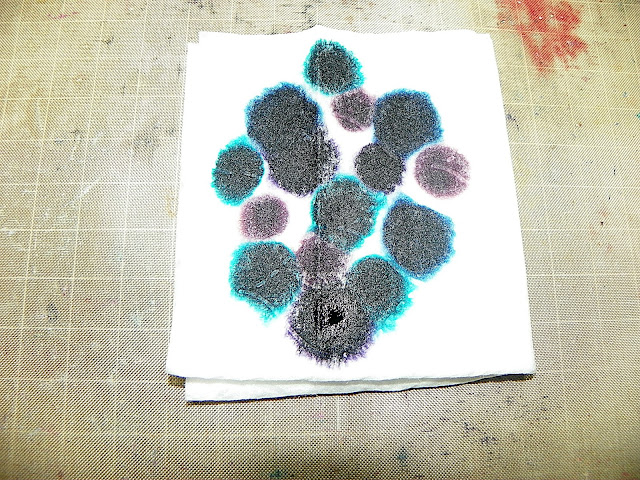
You only need a few drops of each color - So You can see I only
used 3 drops of the Faded Jeans Color
So this is what I ended up with after adding my inks -
So, in the video I watched, she used a Solid Stamp and just went
straight down into the ink with her stamp - (dabbing it)
It was a straight Up and Down motion - the whole point
was to get your stamp wet using the different colors
But if you dip your stamp in several areas - you'll just have a
muddy mess -- (I hope that made sense)
Because I didn't like how my image was - I tried this instead --
I picked up my baby wipe and started to dab at my watercolor paper
Using the different colors -- it turned out neat --
Then I added some Water - I wanted my colors to blend a little more
Then I wanted my Background to shine so I sprayed on some
Frost Shimmer Mist -- (NOTE) -- My photo is not in the right steps -
I Sprayed my Shimmer frost first (which is why it doesn't look like my
Colors blended together) - Again User Error!!! LOL
After letting my Paper Dry (I took a Heat tool to it for the Pictures)
I didn't do that the first time I tried this - I actually let it sit off to
dry til the next day - But You can Totally Use your Heat Gun
I know you wanna get this done! LOL
Then I splattered Some Brushed Pewter Stain on my Background
I thought the Blues & Purples needed a bit of Silver!!!
AND This IS my Final Product!! Everything is blended and actually
Sparkles in person!
Now another (USER ERROR) I noticed for Myself IS
I like to use the Smooth side of this Water color paper
and what did I do??? The Textured side! GRRR!
In Crafting there are NO MISTAKES! Just Happy
Creative outlooks! :)
As you can see - I Made 2 backgrounds with that same Baby wipe
The second image is where I used the Smooth side of the
watercolor paper - See the difference?
They both turned out great, but I'm a SMOOTH Side Gal!! LOL
I do hope you guys try this and let me know if you did --
I would LOOOOVE to see what you create --
Here's the Link to the video I watched
Big HUGS and Have a Great Week!!!
Theresa


12 comments:
Very cool technique and the colors are awesome (I like the silver addition too). Thanks for doing the pictorial. It is absolutely perfect! So quick and easy. Now I need to get some inks so I can try. I have a supply list for the craft store and I am adding to get a few bottles. This was really fun chatting and then creating...I think we will need to do it again!
I can't wait to try it! Thanks for your very clear tutorial!
Evelyn
Awesome!! Will have to try this technique!
Very cool backgrounds! I love how they create such a unique look! Thanks for sharing the tutorial! Have a great day!
Fab tutorial, my friend!! The backgrounds look amazing!! Gorgeous colors!! Have a great day!! Big hugs :)
Lisa
A Mermaid's Crafts
How awesome! This looks like a lot of inky fun and what fabulous results. This would make a great galaxy background - just need a few stars and planets. Thanks for sharing this cool technique!
This looks really fun! Thanks for the step by step instructions. I love how each side looks different, but really great!
These turned out great!! I will have to try it some day... TFS :)
Michelle
Purple Monkey Moments
Wow! So cool! I’ve never tried this before! Thanks so much for the tutorial and links. Yours turned out beautifully!
Thanks for the tutorial. You have inspired me to give this a try.
Hugs Nicole
Great tutorial, Theresa!! I love the gorgeous colors and that background is so beautiful!! I love it!! TFS!!! Have a great day.
Hugs Gerda
Such an awesome and fun technique.. I think I might just try that maybe this weekend coming up. Fun tutorial. Thank you!
Have a wonderful day,
Migdalia
Crafting with Creative M
Post a Comment