Showing posts with label Watercolor paper. Show all posts

Wednesday, April 8, 2020

Happy Birthday Video...

Hello & Happy Wednesday Everyone!
How's your week going so far? I actually have a short
week this week - With Easter coming up this weekend 
we're taking an extra day or 2 off to go drive to the other house -

My hubby needs his medicine, food, New Glasses, and
test kit, so we're trekking down to help him out and work on
the other place - Luckily it's in the middle of nowhere
so we don't have to worry about other people being close by -
- Homes out there are 1 1/2 to 4 acres apart -
I'm hoping to get more work done, since our move is nearing closer -

When I was there back in February, I meet a neighbor (2 streets over)
and she had heard from my husband that I made cards - 
She asked me if I would make some for her grandkids -
Of course, I said YES! One of her granddaughters
LOVES to play video games and likes the color purple
so I created this card with her in mind -


I thought this turned out pretty cool and so did she!
They don't have much for girls who play video games, so I had to kind
of design my own thing - 


Cardstock - Papertrey ink, Neenah Solar White, SU
Watercolor Digital Designer Paper - Silhouette Store
Stitched Rectangle Frame Die - My Creative Time
VersaMark Ink, SSS Ultra Fine White Embossing Powder, Heat Tool
Glossy Accents for the Buttons (Was still wet when I took the picture)
Video Controller images and Sentiment Stamps are from:
Papertrey ink (Game On) & Pretty Cute Stamps (Game On)
Stormy Trendy Twine 
Game Controller SVG File - Silhouette Store (#79637)
Banner Die - My Favorite Things
Fun Foam, Misti tool, Canon IP8720 Printer


This is how I did the inside - I used 2 different shades of grey ink for the sentiment

She hasn't given it to her granddaughter yet - but said she thinks
she'll love it too!


Have a safe and Happy Day!!

Theresa

Wednesday, June 26, 2019

Just popping out...

Hello & Happy Wednesday Crafty Friends!
I had some free time last night, so I decided 
to join in on the Monthly Challenge over at:
The Theme is - MASCULINE

Here's what I created to play along -


Jaded Blossom Products Used -


Just wanted to share the inside with you as well -


Since School is out for the Summer, I thought I would
get a jump start on my Teacher Birthday Cards for the new School
year - This one was made for an awesome male Teacher
I know whose birthday is in August! :)


I'm also Entering the Following Challenges -
Die Cuttin Divas - Happy Birthday
DL Art June Linky Challenge - Anything Goes
Seize the Birthday - Cover the Card


Thanks for stopping by!
Have a FABULOUS DAY!!

Theresa

Friday, July 20, 2018

SumMore Fun Mood Board Challenge #33

Hello & Happy Friday Everyone!
Today... starts another FUN Challenge over at: 


Our Mood Board is - 


 You can use the theme, pictures, or color combo
 You don't have to use
a stamp from SumMore Fun if you don't have one!


All the rules for this fun challenge are RIGHT HERE!


Here's what I created to inspire you --


I went with the Butterflies & some of the colors in the photo.

I heat embossed my Butterfly Heart with some Ultra
Fine White Embossing Powder on a piece of Tim Holtz
Watercolor paper. Then I took 3 Distress Oxide Inks in
Salty Ocean, Mermaid Lagoon, & Seedless Preserves
and blended them on a Clear block with some water -

 Then I laid it on top of my watercolor paper and let 

it sit for about 3 minutes (so I could get the vibrant colors.
I let it dry completely before running it thru my Gemini Machine
with the Rounded Corner Stitch Die. Then I grabbed the
Kindness Sentiment and a piece of Black Scrap CS.
and Heat Embossed that as well - I used my Lawn Fawn
Long Banner Die to cut it out -

I adhered everything together on a piece of White Cardstock

then added some Fun Foam to pop up
onto my Black square Card Base! For a finishing touch
I added some Ice Cube Jewels from Lucy's cards.

PRODUCTS USED FROM SumMore Fun Stamps


Just a reminder that if you play along, the Random
winner wins a $20 Gift Certificate to the 
SumMore Fun Stamps Store AND if you use a
SumMore Fun Stamp on your project 
 you'll get a $40 Gift Certificate!!
This is such a wonderful prize!!


I hope you guys can join us --
 I would LOVE to see what you create!


If you're interested in any of the
Products from SumMore Fun Stamps
I have a Discount Code you can use

It'll get you 10% off your order!!


New to SumMore Fun Stamps??
Check out the SumMore Fun Stamp Store
SumMore Fun Blog
SumMore Fun Facebook Page

You can find me at these links 
Facebook - Pinterest


Thursday, June 28, 2018

Smooshing CAS Card...

Hello & Happy Thursday Everyone!
I have a quick post for ya today!

I decided to make a Quick Smooshing Technique Birthday Card --


I grabbed a piece of watercolor paper, a couple of

Distress Oxide inks in Tattered Rose, Worn Lipstick,
and Twisted Citron, and the Cherry Blossom Stamp set
by Raisin Boat 

I stamped my Cherry Blossom image onto the watercolor paper 
with some versamark ink then poured some
Ultra Fine White Embossing Powder over it -
I then heated it all up -

Then I added the Distress Oxides to a clear block
and sprayed it with some water
I laid it right on top of my embossed image
and I let it sit there for a few minutes to
get the colors soaked into my paper 

Once I lifted it off, I heat set my paper again
Then I added some flicks of the pink & green inks
onto my paper to give it a splattered look
I heat set it one more time to make sure everything
was dry before putting it through
my Gemini Jr. with the Stitched Rectangle Die

Once it was complete I added the Celebrate
Sentiment in some Memento Tuxedo Black ink
and adhered it to a piece of White Fun Foam
for added Dimension -

Of course, it needed some Sparkle so
I grabbed a couple of Clear Adhesive Gems
and it was ready to go!!


 I also wanted to remind YOU

We still have our Challenge going on over at


  Here's our Mood Board 


I'm sure you ALL can make something
with this awesome board!! --  You don't have to use
a stamp from SumMore Fun Stamps if you don't have one!
We have 1 random winner - Prize is a $20 Gift Certificate to 
the SumMore Fun Stamp Store! AND if you do use one of
our stamps and win, you'll get a $40 Gift Certificate to the store!!

All the rules for this fun challenge are RIGHT HERE!

The Challenge ends Thursday, June 21st!!!
So make sure to join us!


If you're interested in any of the
Products from SumMore Fun Stamps
I have a Discount Code you can use
It'll get you 10% off your order!!


New to SumMore Fun Stamps??
Check out the SumMore Fun Store
SumMore Fun Blog
SumMore Fun Facebook Page

You can find me at these links 
Facebook - Pinterest


Thanks so much for stopping by!
Have an AWESOME Day!!


Tuesday, May 29, 2018

Brewing Up...

Hello & Happy Tuesday Everyone!!
How was your Memorial Day Weekend?
Did you do anything Fun? Travel? BBQ?
We Stayed home and relaxed... We have plans 
on Visiting my Sister in the next week or two
so we decided to keep this past weekend a
little low key - Plus its too HOT outside!! LOL

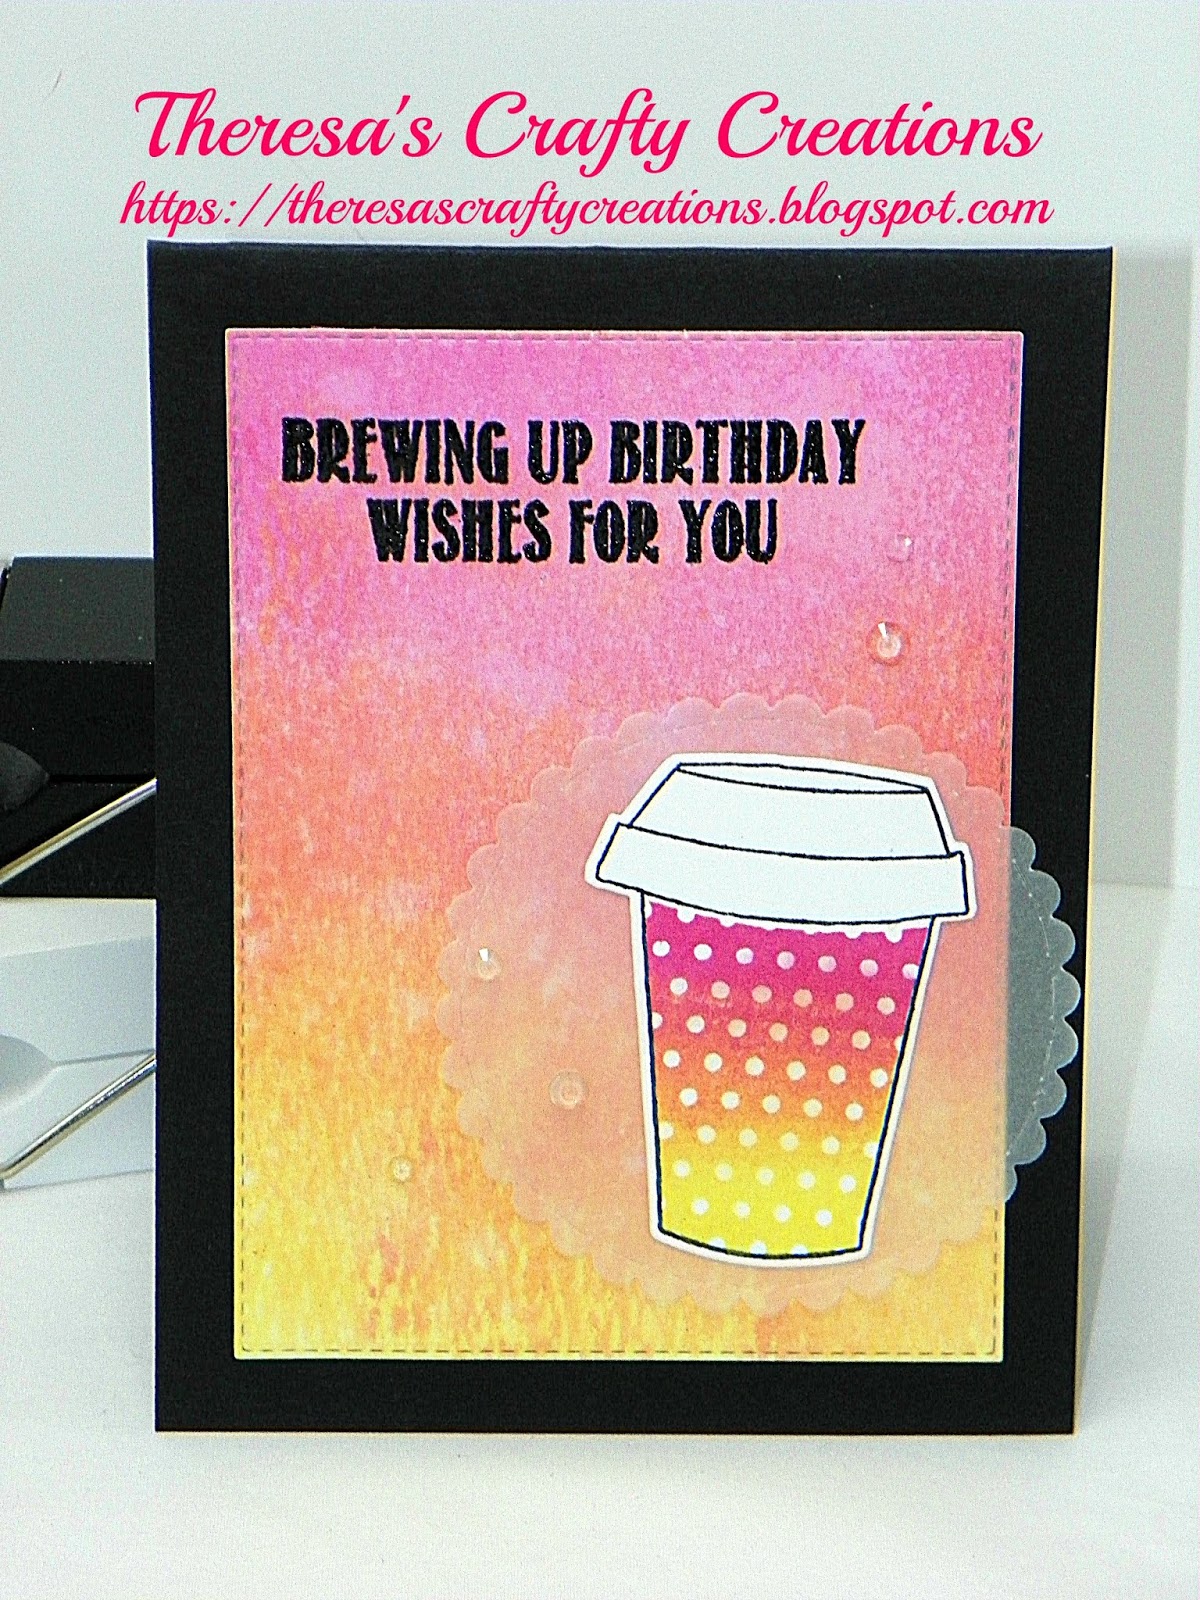
I'm back with another Coffee card for the
Coffee Lovers Spring/Summer Blog Hop


Here's the Sweet Card I Made --


I made this card for my Mom - Her Birthday
was on Sunday and she enjoys coffee -
She can only have Decaf these days and I think she's
just happy she can still drink any kind of coffee!! :)

I used some watercolor paper from Tim Holtz
2 Distress Oxide Inks in Squeezed Lemonade &
Picked Raspberry
Coffee Break Stamp & Die Set from My Creative Time (Coffee Cup)
Coffee Break Stamp set from Jaded Blossom (Sentiment)
Stitched Scallop Circle Die on the Vellum is from Craftin Desert Divas
Super Fine Black Embossing Powder, Embossing Buddy,
Heat Tool, Gemini Jr., Misti Tool, Lucy's Cards Ice Cube Jewels,
Fun Foam, Paper Trey Ink Cardstock


Have a FABULOUS DAY!!

Theresa

Wednesday, April 25, 2018

Thanks for the Blog Love!!

Hello & Happy Wednesday Everyone!
I've got another quick post for you today!

I told ya before I was gonna try and
this year and I'm 4 for 4 as of right now! Yay ME!!!

 So this months Challenge is a COLOR Challenge


I needed to make a Thank You card so this
is what I created --


Now... I'm not much of a colorist and I'm totally okay with that!
But I gotta say... I'm happy with how this turned out -

The Products from Jaded Blossom that I used are -


Other Products Used -

Assorted Washi Tape, Arteza Brush Pens
Koh-I-Noor Bristol Smooth CS, Scan N Cut,
Big Shot, Misti Tool, Memento Lilac Posies Ink
Clear Wink of Stella Pen, Stampin' Up Purple CS,
Recollections 110lb White CS


Thanks for stopping by!
Have a FABULOUS DAY!!!


Theresa

Wednesday, February 7, 2018

Wishing you a Sweet Season..

Hello & Happy Wednesday Crafty Friends!
How's your Week Going? Mine is
pretty good! We have beautiful Spring Like
Weather outside and I'm just lovin' it!

I thought I would show you another Christmas 
Card for 2018 - I hope you don't mind...


I thought this one turned out so cute!

I colored those adorable Gingerbread Images with my Zig Real 
Brush Pens on some Tim Holtz Watercolor paper
(Gingerbread Friends & Sentiment) - My Creative Time
The stitched Candy Cane background is also from My Creative Time
along with the Stitched Rectangle Die

Cardstock - Stampin' Up, Recollections 110lb, Bazzill
White Gel Pen
Designer Paper - Fancy Pants (Oh' Deer!)
Ice Cube Jewels - Lucy's Cards
Scallop Trim Border Punch - Stampin' Up
Big Shot, Misti tool
Memento Rich Cocoa Ink, Versafine Onyx Black Ink


Thanks for Stopping By!
Have a Fabulous Day!

Theresa

Monday, January 8, 2018

Baby Wipe Tutorial --

Hello & Happy Monday Everyone!

This weekend my AWESOME Crafty friend
Georgiana from Carson's Creations
asked me if I would do a Follow up
Tutorial on the Baby Wipe Method Card I Made 

So, I said SURE I could --
Now, I know there are some videos
on how to do this - But I only watched
1 video and it was from a Stampin' Up Demo.
from Aug. of 2017 - 

When she did the Baby Wipe Method -
She used a Stamp with this method
Because that's how you're suppose to do it!

I tried it and didn't like my results with my stamp
and it was TOTALLY USER ERROR!
I should have used a Solid image stamp
Which, well I DID NOT!! LOL

And that's when I thought could I do this
on my water color paper?? Sure Enough &
I got some really NEAT RESULTS from it --

Soooo -- Here ya go - I hope it helps someone out!


I started out with Baby Wipes, 4 Distress Inks and some Tim Holtz Water Color Paper
Now - You can probably use ANY water color paper (I just like this type)
And YOU MUST use DYE INK - It's what works with this technique
So any dye inks you have will work! :)


I took 2 Baby wipes and layed them on top of each other


I folded it in half


Then folded it one more time - to look like this!

You do this so the Baby Wipe acts like an Ink Pad


You only need a few drops of each color - So You can see I only
used 3 drops of the Faded Jeans Color


So this is what I ended up with after adding my inks -

So, in the video I watched, she used a Solid Stamp and just went
straight down into the ink with her stamp - (dabbing it)
It was a straight Up and Down motion - the whole point
was to get your stamp wet using the different colors
But if you dip your stamp in several areas - you'll just have a 
muddy mess -- (I hope that made sense) 


Because I didn't like how my image was - I tried this instead --
I picked up my baby wipe and started to dab at my watercolor paper
Using the different colors -- it turned out neat -- 


Then I added some Water - I wanted my colors to blend a little more


Then I wanted my Background to shine so I sprayed on some
Frost Shimmer Mist -- (NOTE) -- My photo is not in the right steps -
I Sprayed my Shimmer frost first (which is why it doesn't look like my
Colors blended together) - Again User Error!!! LOL


After letting my Paper Dry (I took a Heat tool to it for the Pictures)
I didn't do that the first time I tried this - I actually let it sit off to
dry til the next day - But You can Totally Use your Heat Gun
I know you wanna get this done! LOL 

Then I splattered Some Brushed Pewter Stain on my Background
I thought the Blues & Purples needed a bit of Silver!!!


AND This IS my Final Product!! Everything is blended and actually 
Sparkles in person!

Now another (USER ERROR) I noticed for Myself IS
I like to use the Smooth side of this Water color paper
and what did I do??? The Textured side! GRRR!

In Crafting there are NO MISTAKES! Just Happy
Creative outlooks! :)


As you can see - I Made 2 backgrounds with that same Baby wipe
The second image is where I used the Smooth side of the 
watercolor paper - See the difference? 
They both turned out great, but I'm a SMOOTH Side Gal!! LOL

I do hope you guys try this and let me know if you did --
I would LOOOOVE to see what you create --

Here's the Link to the video I watched


Big HUGS and Have a Great Week!!!

Theresa