Monday, October 31, 2016

Happy Halloween!!!

Hello & Happy Halloween Everyone!
I've got on my Spooky Halloween Pants & Shirt today
to celebrate this fun Candy Feast day! LOL

With Halloween in mind - I've got 1 last Halloween card
to show you - I made this the other day using another
NEW die from Gina Marie Designs


I got ALL inked up on this one! I think it turned out cool!


I thought I would share HOW I created this card with you -
Not everyone uses Distress inks or sprays, and I thought
running through the process might help someone else try it out! :)


I used my Distress inks to create the background - I started out with the orange, yellow, green, & purple colors - Then I sprayed my Watercolor paper with water, waited a minute then placed a paper towel over it, then lifted the paper towel - Doing that process helps remove some of the ink and leaves light water spots on the paper -

Then I took my Black re-inker & mixed some water with it and some
Shimmer mist - then, took my splatter paint brush to splatter
it on top of the colors I had already on the paper -
I thought purple splatters would give it a nice look too - so, 
I took my Purple re-inker and did the same
method as I did for the black one - 

(I only did this with the re-inkers because I don't own
any of the colored Spray stains) - If I did, I would have use those instead of the re-inkers!) (just an FYI) :)

Then I had to wait to let it dry
THAT TOOK FOREVER!!! So I used my Heat tool to help it along! :)
I then used my Brushed Pewter Distress Spray and then
Sprayed the entire card with the Frost Shimmer spray
Again - HAD to let it dry! :) 
So, you really can't tell in the photo, but the card does have a sparkle/shimmer to it, because of the shimmer frost spray I used....

While it was drying, I cut out the Spooky Tree die 3x's 
to give it some dimension and the Bats
I cut out 8x's - 3x's each for the ones on the front of the card -
and the other 2 for the inside of my card! :)
Before cutting out my dies I added Double sided adhesive to the black cardstock before cutting - this way everything has adhesive on it already, which makes it easier to layer & adhere to my card
Once the card was completely dry - I Die Cut it with a 
Stitched Card Mat Die then added the Tree & Bats to the card front 

The sentiment was embossed with 2 different Embossing powders
 I used my Static Tool Powder first, then I stamped the Sentiment with Versamark Ink (Using the Misti tool) -
 I added some Orange/Red mixture of Embossing powder and heat set it
Then I went back and re-stamped the sentiment with versamark ink
and Used the Black Embossing powder - I did offset
the stamp just a tiny bit - Which gave it that COOL Shadow Effect!

I then attached the card to my Black card base - and thought
it needed just a tiny bit of sequins - which I adhered with some glossy accents - Then added some Washi tape to the white card mat that
was going inside my card along with the 2 bats


-- PRODUCTS USED --

Cardstock - Stampin' Up, Canson Watercolor
Tim Holtz Distress Inks - Carved Pumpkin, Twisted Citron, 
Squeezed Lemonade, Wilted Violet
Tim Holtz Distress Spray Stain - Brushed Pewter
Tim Holtz Distress Re-Inkers - Black Soot, Dusty Concord
Frost Sheer Shimmer Spritz Spray
Sentiment & Sequins - My Craft Spot (No Longer Available)
Embossing Powders - Clear Tops (Summer Potpourri) & WOW! (Ebony Black)
EK Success Static Powder Tool
Marvy Heat Gun
Misti Tool
Versamark Ink
ATG Gun, ThermOWeb, Elizabeth Crafts Adhesive, Glossy Accents
Stitched Card Mat Die - My Favorite Things
Orange/Black Washi Tape - Recollections (For the inside of my card)
Spooky Tree & Bat Die Set - Gina Marie Designs


Thanks so much for stopping by today!
Have a FANTASTIC & SAFE HALLOWEEN!!!!


Theresa
Friday, October 28, 2016

Sweet Winter Bear....

Hello & Happy Friday Everyone! YAY! 
The Weekend is here again!!! October is
just about over and we are heading straight for
the Holiday Season! I'm so excited! I LOOOVE
the Holidays! It really IS my favorite time of year!

PLUS - I'm having 2 Christmas' this year!
YES! I said TWO!!! :) My son who is an
AMAZING MARINE - will be home for a few days
this next month - Which you ALL know how
Excited I am to see him! :)  (Jumping Up & Down)

Since he'll only be home for a very short time
I thought I would combine Thanksgiving & Christmas for him

YES! that means a lot of work on my part - But...
My boys are always worth the extra work/effort! :)

This will be our last visit with him for awhile ... (SAD FACE)
But he has a duty to our country, and I must share him ---
I don't want to share --- But they say it's nice to share! (WHATEVER)!!

Anywho... As it gets closer to his arrival date, I'll let you
all know... cause I will probably be offline for a little bit! :)

In the mean time, let me share another Holiday card with you!


Isn't this little guy ADORABLE??? Super CUTE Bear! :)
He's got some Sparkle on his Hat & Cheeks! :)
The Winter Bear is an SVG file from KaDoodle Bug Designs


Oh... and that background paper - isn't Paper!!
It's WASHI TAPE!!! EEK!!!!
How cool does that look? Seriously? I just LOVE it!
I purchased some Christmas Washi tape from Micheal's
awhile back when they had a SALE of course! (Wink Wink)
And this is from 1 entire set - it had 9 rolls in it


--- Products Used on my Card ---

Cardstock - Stampin' Up, Bo Bunny, Georgia Pacific, Bazzill
Assorted Washi Tape - 9 roll Pack (Recollections)
Clear Wink of Stella Glitter pen - On the hat & Heart cheeks
White Signo Gel Pen - for the doodling
ATG Gun, ThermOweb, Dimensionals, Glossy Accents
Stitched Card Mat Dies Lg. & Med. - My Creative Time
Candy Cane Trendy Twine
Sentiment, Tag Die, Sequins - My Craft Spot (No Longer in Business)


Thanks so much for stopping by today!
I hope I've given you some inspiration this week
to get started on those pesky holiday cards!
They don't make themselves you know! LOL

Have a FABULOUS Weekend!!


Theresa

Thursday, October 27, 2016

Fall Magnets...

Hello & Happy Thursday Everyone!
Today, I'm switching gears and showing you
some pretty wood magnets I made -


These were super inexpensive to make -
I got the wood pieces from Joann Crafts when they had
a 60% off sale - So, for all 3 of these - cost me less than a $1
Pretty Sweet Deal! :)  I also used my distress inks (Shown in the photo)


Using the Distress Inks, made them look more realistic - 
Which is what I love most about them - 


As you can see, I distressed both sides of the wood pieces &
 added 2 magnets for each one, adhering them with glossy accents


I hope you liked my magnets - I think they look pretty on my fridge!
Have a FABULOUS DAY!!!


Theresa

Wednesday, October 26, 2016

Halloween Apron....

Hello & Happy Wednesday Everyone!
I hope your week is going well so far!
Today is a super Quick post! I told you
I wanted to teach myself how to sew....
And I'm still learning! :) But I also told
you my son was learning to sew at school too!

He made a pillow case already & now he has
made my Halloween Apron - YAY!

It turned out so cute - So I just thought I would share
it with you -


My Handsome 13 yr. old! We got the material at Joann Crafts when
they had a Sale on their Holiday Material - I picked it out cuz
I thought it was fun & Whimsical! :)


He just brought it home yesterday.... The Teacher only gave the kids
2 days to make an apron - Which seems silly when they had
to follow directions on a sheet of paper - She wasn't showing them anything - Soooo... he took longer as did most of the class - Some are
still working on theirs... I'm just glad he was able to finish before
Halloween! LOL -- Now to make my Christmas Apron - We will try and do that one together! Wish me luck! I'll share it when it gets completed!

Have a FABULOUS DAY EVERYONE!!!

Theresa

Tuesday, October 25, 2016

Reindeer Snowflake....

Hello & Happy Tuesday Everyone!
I'm back with another Holiday Card to share with you!
I'm using the same Bell Die from yesterday's post -
I told you, you could use the dies by cutting all the
pieces out or as an embossed look - Now you know I cut
out all the pieces, and I told you I used the snowflake
pieces for the inside of my card - Well... I had those
beautiful reindeer pieces left, along with some stars & dots
So, check out what I did with the extra pieces --


Man.... I just love this card! It's so pretty & it sparkles in real life!
I know I've mentioned before how I LOVE Blue, Silver, & White together for Holiday cards... they're just so Elegant looking together! :)


You can see a Hint of an extra snowflake added to the inside of my card
The Snowflake die is another Gina Marie Designs
NOOOO, I do NOT work for her! I just love her Dies and their
very affordable for the average crafter! PLUS, They cut out like BUTTER!


-- Products Used on this card --


Cardstock - Stampin' Up, Georgia Pacific, American Crafts
Stitched Card Mat Die - My Favorite Things
Snowflakes, Reindeer, Stars, Dots - Gina Marie Designs
Stitched Banner Die - Jaded Blossom (Mini Die Tags 2)
Time Holtz Distress Spray Stain - Brushed Pewter
Frost Sheer Shimmer Spritz
Silver Moondust Glitter Drops - Nuvo
Sentiment - My Craft Spot (No Longer Available)
Misti Tool, Dimensionals, ATG, Elizabeth Crafts Adhesive
Black Tuxedo Memento Ink


Thanks so much for stopping by!
Have a Fabulous Day!!!

Theresa

Monday, October 24, 2016

Silver Bells...

Hello & Happy Monday Everyone!
I hope you all had a great weekend!
I know I did... I actually made 7 more Christmas cards!
Yay, Me!!! I'm sooo excited to share them with you!

I happen to get my order from Gina Marie Designs
over the weekend, so you know I just HAD to try out
my new dies! My mom was eyeing a couple of them -
So, I told her to let me get the first cuts in and then she
can use them - So, you see... It was very important
that I make some Christmas cards! hahaha


- Here's some Christmas Inspiration for you -


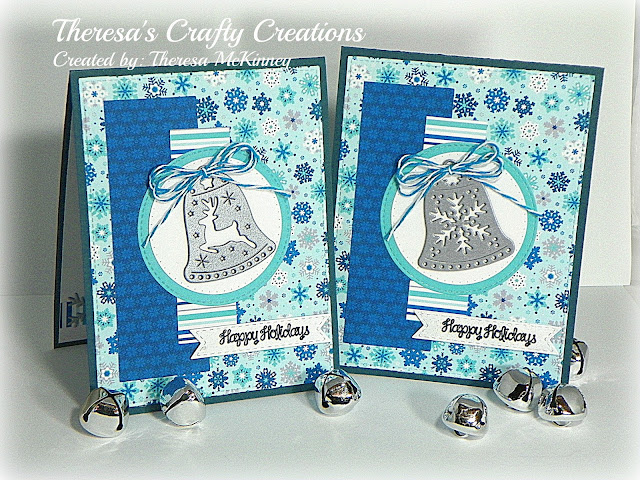
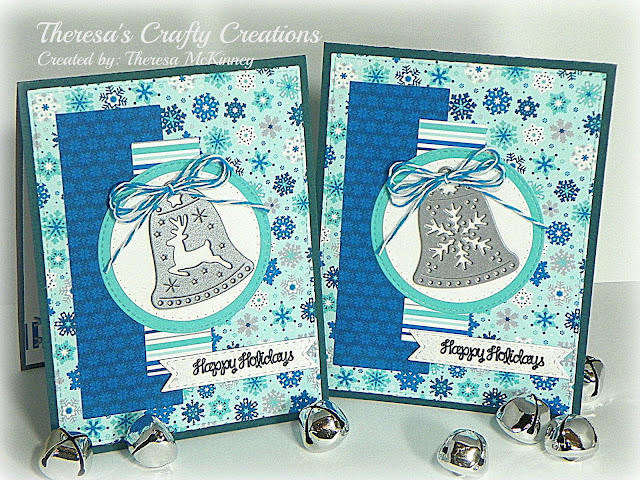
OMGOSH.... Aren't these Bells soooo PRETTY!!!!
I just love them, they are NEW from Gina Marie


As you can tell, I made the same design for both cards -
I just wanted to use both dies - I cut each die out 3x's to give the bells 
some Dimension - I cut them out with some Silver Cardstock


You can leave the cuts on the die to give it an embossed look
I just took them out, so the White backdrop would show through - 
I used the Snowflake pieces for the inside of my card - 
You could probably see a hint of it in the photo - 
I know I should have taken a picture of the inside
to show you - SORRY! :)


I think the Paper is a perfect match up - It's Echo Park (Hello Winter)


-- Products Used on these Cards --

Cardstock - Stampin' Up, Georgia Pacific, American Crafts
Designer Paper - Echo Park (Hello Winter)
Bell Dies - Gina Marie Designs (Two Bells Dies)
Sentiment - Stamps of Life (Merry & Bright Club Kit)
Stitched Card Mat & Large Circle Dies - My Favorite Things
Small Dotted Circle Die - My Creative Time
Stitched Banner Die - Jaded Blossom (Mini Tags Die 2)
Twine - We R Memory
Silver Moondust Glitter Drops - Nuvo (Used inside the card)
Misti Tool, Dimensionals, Elizabeth Craft Adhesive, ThermOweb, ATG


Thanks so Much for Stopping By!
Have a FANTASTIC Day!!!


Theresa

Friday, October 21, 2016

Dec. 25th....

Hello & Happy Friday Crafty Peeps!
I hope your as excited for the weekend as I am!
October is almost over and we are really getting
closer & closer to the holidays - :)

Today, I've got another Holiday card to show you -
Did you notice yesterday's card was also a holiday card?
That's right! I'm stepping up my game this week and made 2 holiday
cards instead of 1! I'm soooo gonna rock the holiday's this year! LOL


I simply LOVE the way this card turned out! I used the same Designer Paper as yesterday's card - Both from Simple Stories (Claus & CO) - 
I made them the same night - 
I was playing around in my Silhouette Studio Program
and came up with them - The gold splatters for the background is my favorite part! :) Well... the Dec. 25th Die is another Fav of mine! :)


-- Products used on this card --

Cardstock - American Crafts, Stampin' Up
Digital Designer Paper - Simple Stories (Claus & Co.)
Christmas Tree Parts (Cut out 2x's), Star Strip - Simple Stories 
Dec. 25th Die - My Creative Time
Clear Wink of Stella Glitter Pen - On the Star & Dec. 25th Die
Tim Holtz Distress Spray Stain - Tarnished Brass
Stitched Card Mat Die - My Favorite Things
Gold Enamel Dots - My Mind's Eye
Stampin' Up Ink for Shading
Dimensionals to POP up the Tree pieces & Dec. 25th Die


I'm Entering the Following Challenge:


Thanks for stopping by today!
I hope EVERYONE has a FABULOUS WEEKEND!!!

Theresa

Thursday, October 20, 2016

Ho! Ho! Ho!!! & a Winner!!!

Hello & Happy Thursday Everyone!
I hope your week has been going well so far!
The weekend is just around the corner, so hopefully
you can make it to Friday! :) Today, I've got a FUN
Christmas card to show you -

I'm using a super CUTE SVG File from: 


I think this turned out Adorable with those Santa feet!


-- Products Used on my Card --

Cardstock - Stampin' Up, American Crafts, Georgia Pacific, Bazzill
Designer Paper - Simple Stories (Claus & Co.)
Sentiment - My Craft Spot (No Longer in Business)
Spectrum Noir Clear Glitter pen - on the buckles & White fluff
Stitched Card Mat & Stitched Circle Dies - My Favorite Things
Stitched Banner Die - Jaded Blossom (Mini Tags Die 2)
Light Adhesive Backed Canvas for my sentiment/banner
Sakura White Gelly Roll Pen - for the doodling
Santa's Boots - KaDoodle Bug Designs


I also have the WINNER of the AWESOME Halloween Stamp set -
Congrats - MIGDALIA
Migdalia - Please send me your address so I 
can get this set out to you! My Email address is
on the side bar - right under my Picture - THANK YOU!

Thanks for all the wonderful comments everyone!
I'll be doing another Giveaway very, very soon!

Have a Fabulous Day!!!

Theresa

Wednesday, October 19, 2016

- Thankful

Hello & Happy Wednesday Everyone!
I created this lovely Fall card with a
Leaf card design I found at the Silhouette Store...
I altered it a little, so I could use it as a stencil....


I really like this "Thankful" Die - I die cut it out 3x's to give it more dimension - I die cut a Leaf Stencil Frame from the Silhouette Store - added some repositional adhesive to the back of it and attached it to another white card base - I used my blending tool and 3 of my favorite distress inks to blend it all together - When I was happy with the blending, I lifted the Leaf frame to show off the pretty leaves - then I die cut it out with a stitched card mat die - I added Brass Distress Spray, using a splatter paint brush - it dried super quick
Then I cut out a piece of 4 x 5 1/4 designer paper (Rust Color)
Added it to the Brown Card base (A2) 4 1/4 x 5 1/2
Cut a piece of White Fun Foam and adhered that to the back of my leaf design (for Dimension) then attached it to the card - Added my Word Die Sentiment, then attached a couple of sequins


This totally Screams FALL!! Love the look! :)


-- Products used on my card --

Cardstock - Stampin' Up, Georgia Pacific
Designer Paper - DCWV (Autumn Leaves Stack)
Leaf Stencil card Frame - Silhouette Store (#19971)
Tim Holtz Distress Spray - Tarnished Brass
White Fun Foam for Dimension
Glossy Accents to adhere the Sequins
Stampin' Up Daubers to blend
Splatter Paint Brush
Tim Holtz Distress inks - Wild Honey, Rusty Hinge, Crushed Olive
Sequins - Tickled TurtleBaroque, but still shopping (Firefly crafts)
"Thankful" Die, Stitched Card Mat Die - Gina Marie Designs


Just a quick reminder - I have a giveaway going on that ends tomorrow
Check it out - RIGHT HERE!!!!!


Thanks so much for stopping by!!
Have a Crafty Day!

Theresa

Tuesday, October 18, 2016

Such a Hoot!

Hello & Happy Tuesday Everyone!
Today, I've got a sweet Fall card to share with you -


I actually created this card for my August 
Card Swap and Forgot to post it! :) 
The theme for that month was
FALL or THANKSGIVING
and we had to use Sketch #343 from Mojo Monday


-- Products used on my card --

Cardstock - Stampin' Up, American Crafts
Designer Paper - Echo Park (Fall is in the Air)
Owl Tag - Echo Park (Fall is in the Air)
Sketch - Mojo Monday #343 (April 2014)
Jute Twine - Papertrey Ink
Rust Crinkled Ribbon - 3 Girl Jam (No Longer in Business)
Stitched Card Mat Die - My Favorite Things

Don't forget I have a Giveaway going on right HERE!!!!
It Ends Thursday, so make sure to check it out! :)


Thanks so much for stopping By!
Have a fabulous day!

Theresa